![]()
Adding or Editing Blog posts with Windows Live Writer
Ektron CMS400.NET authors and membership users can use Windows LiveTM Writer to add and edit blog posts to your site. If users have the proper permissions, they upload images and attach files from their system. See Also: Permissions and Approvals.
For additional Windows Live Writer help from Microsoft, click here.
Follow these steps to set up Windows Live Writer to work with your Ektron CMS400.NET Blog. If you have previously set up Windows Live Writer, choose Weblog > Edit Weblog Settings. Then, skip to step four.
|
Step |
Windows Live Writer Setup Screen |
|
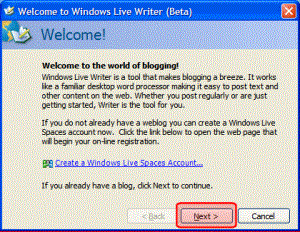
1. Download and Start Windows Live Writer. When the Welcome window appears, click Next. Do not create a Windows Live Spaces account. |
|
|
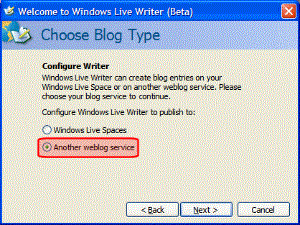
2. In the Choose Blog Type window, select the Another weblog service radio button.
Click Next. |
|
|
3. In the Weblog Homepage and Login window, enter the following information: Weblog Homepage URL - this is the page that contains the blog. For example, http://<your site>/CMS400Min/blogs.aspx. Username - your username to log on to the Ektron CMS400.NET site. Password - your password to log on to the Ektron CMS400.NET site. Edit Proxy Settings... - edit the proxy settings as needed.
Click Next. |
|
|
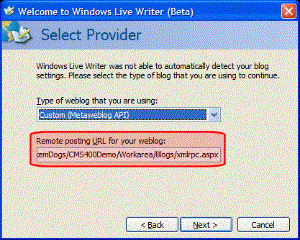
4. In the Select Provider widow, choose Custom (Metaweblog API) from the Type of weblog that you are using dropdown box. |
|
|
5. In the Remote posting URL for your weblog textbox, add a link to the xmlrpc.aspx file for the site. The default location for the file in the demo site is http://<your site>/CMS400Min/Workarea/Blogs/xmlrpc.aspx.
Click Next. |
|
|
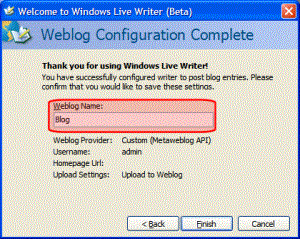
6. When the Weblog Configuration Complete window appears, Add a blog name in the Weblog Name field.
Click Finish. |
|


![]()